A Comprehensive Guide to Growing & Harvesting Dill
Dill (Anethum graveolens) is one of my favourite herbs. It’s used in various cuisines worldwide for its distinct flavour and fragrance. Over the years, I have personally experienced the joy of growing dill in my own garden, reaping the rewards of its easy-to-grow nature and the numerous benefits it brings. In this article, we will explore how to grow dill, how to plant and harvest it, and discuss its care requirements, as well as ideal companion plants, drawing from my own gardening adventures and expertise.
Dill Varieties
Dill is a versatile herb with various cultivars, each offering unique characteristics suitable for different gardening needs and culinary preferences. Among the numerous dill varieties, my personal favourites are Bouquet Dill and Mammoth Dill, thanks to their abundant production of flavorful leaves and seeds, as well as their striking appearance in the garden. Here are some popular varieties:
- Bouquet Dill: A popular variety known for its early and abundant production of flavorful leaves and seeds, reaching a height of 2-3 feet.
- Mammoth Dill: A tall and vigorous variety that can reach up to 4-5 feet in height, featuring large seed heads and a slightly stronger flavour compared to Bouquet Dill.
- Fernleaf Dill: A compact, dwarf variety with fine, feathery foliage, perfect for container gardening or small spaces.
- Dukat Dill: A slow-bolting variety with a sweet flavour and high essential oil content, making it excellent for culinary use.
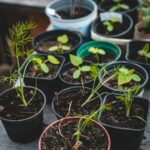
How to Grow Dill from Seed
The easiest way to start growing dill is by sowing seeds directly into your garden. Begin by selecting well-draining soil with a pH between 5.8 and 6.5. Sow seeds about 1/4 inch deep and 18 inches apart in rows, as dill can grow quite tall. Keep the soil consistently moist until seedlings emerge, which usually takes 7 to 14 days. If you wish to start seeds indoors, transplant seedlings outdoors once they reach a height of 3-4 inches.
How to Plant Dill
When planting dill, select a location that receives at least 6-8 hours of sunlight daily. Dill prefers well-draining soil and does not tolerate waterlogged conditions. Amend the soil with compost or aged manure to improve drainage and fertility. To encourage bushier growth, pinch off the growing tips when plants reach a height of 6 inches.
Dill Plant Care
Dill is a popular herb that’s relatively easy to grow, but proper care is essential to ensure healthy growth and flavorful harvests. In this section, we will discuss essential dill plant care tips, including watering, fertilizing, pest control, and more.
-
Watering
Dill prefers consistently moist soil, but it’s important not to overwater. Overly wet soil can lead to root rot and other diseases. To maintain the right moisture level, water your dill plants deeply once or twice a week, depending on the climate and soil type. Watering in the morning is recommended to minimize the risk of fungal diseases.
-
Fertilizing
Although dill is not a heavy feeder, it benefits from occasional fertilization. Apply a balanced liquid fertilizer (such as a 10-10-10 formulation) every 4-6 weeks during the growing season. Alternatively, you can use organic fertilizers like compost tea or fish emulsion. Be sure to follow the package instructions for proper application rates.
-
Mulching
Mulching helps conserve moisture, suppress weeds, and regulate soil temperature. Apply a 2-3 inch layer of organic mulch, such as shredded leaves, straw, or wood chips, around the base of your dill plants. Keep the mulch a few inches away from the stem to prevent fungal diseases and rot.
-
Pruning
Regular pruning promotes bushier growth and prevents your dill plants from becoming too leggy. Pinch off the growing tips when plants reach a height of 6 inches. You can also remove any
yellowing or dead leaves to improve air circulation and overall plant health.
-
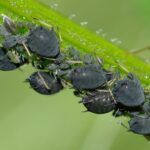
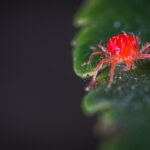
Pest and Disease Control
Dill is generally resistant to pests and diseases, but some problems may arise. Common pests that attack dill include aphids, spider mites, and caterpillars. You can control these pests by regularly inspecting your plants and removing them manually, or by using insecticidal soap or neem oil as needed.
Dill may also be susceptible to fungal diseases like powdery mildew, especially in humid conditions. To prevent fungal diseases, ensure proper spacing between plants for good air circulation, and avoid overhead watering. If you notice any signs of infection, remove affected leaves and treat the plant with a fungicide according to the product’s
instructions.
-
Supporting Tall Plants
Taller dill varieties may require staking or support to prevent them from toppling over, especially in windy conditions. Use bamboo stakes or garden trellises to provide support, and tie the stems loosely to the support structure with soft twine or garden ties.
-
Overwintering
Dill is an annual herb, which means it completes its life cycle in one growing season. However, if you live in a mild climate, you can try to overwinter your dill plants by providing a thick layer of mulch to protect the roots from freezing temperatures. In colder regions, consider growing dill in containers and bringing them indoors during the winter months.
By following these dill plant care tips, you can ensure a healthy, bountiful harvest of this flavorful herb. Proper care not only enhances the growth and appearance of your dill plants but also improves the taste and aroma of your harvested leaves and seeds.
Common Questions Answered
How Tall Does Dill Grow & How Much Sun Does It Need?
Depending on the variety, Dill can grow anywhere from 2 to 4 feet tall. It requires full sun, which means at least 6-8 hours of sunlight daily. In regions with hot summers, dill can benefit from afternoon shade.
Harvesting Dill
When it comes to harvesting dill, timing is crucial to ensure the best flavour and to keep your plant healthy. This section will provide a detailed guide on harvesting dill leaves and seeds without damaging the plant.
Harvesting Dill Leaves
To harvest dill leaves without harming the plant, follow these simple steps:
- Choose the Right Time: The best time to harvest dill leaves is in the morning after the dew has dried but before the sun gets too hot. This ensures that the leaves have the highest concentration of essential oils, providing the best flavour.
- Select Healthy Foliage: Look for healthy, green leaves, preferably on the outer stems of the plant. Avoid harvesting yellow or wilted leaves, as they will have lost some of their flavour.
- Use Clean, Sharp Scissors: To avoid damaging the plant, use clean, sharp scissors or pruning shears when snipping off the leaves. Make sure to sterilize your cutting tool with rubbing alcohol or a mild bleach solution before use.
- Snip Leaves Gently: Cut the leaves gently, taking care not to damage the main stem or adjacent foliage. Harvest small amounts of leaves at a time, as this will allow the plant to continue growing and producing more leaves throughout the season.
- Rinse and Store: After harvesting, gently rinse the leaves under cool water to remove any dirt or insects. Pat them dry with a paper towel or clean cloth, then store them in an airtight container or plastic bag in the refrigerator until needed.
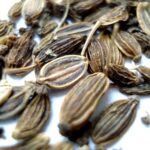
Harvesting Dill Seeds
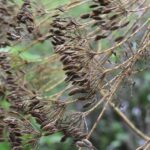
For harvesting dill seeds, follow these steps:
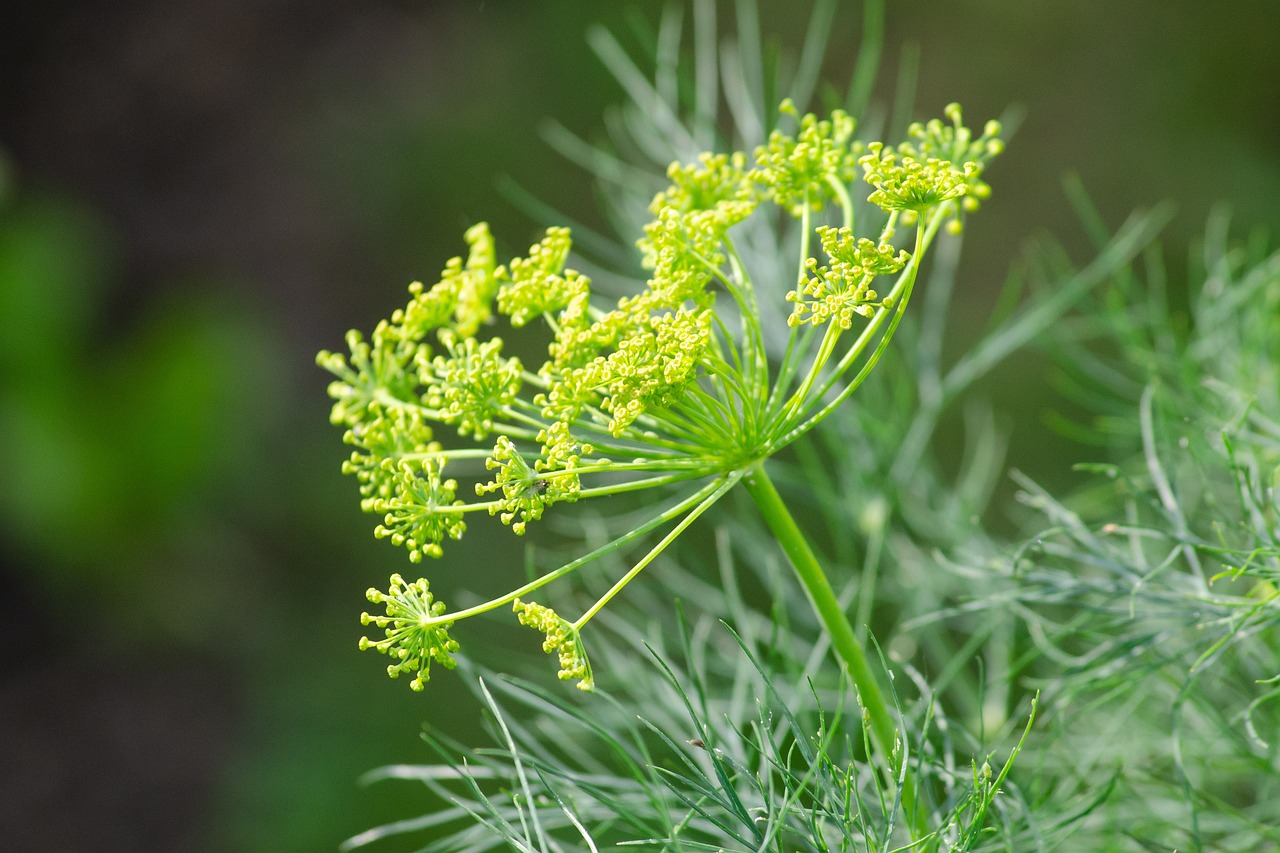
- Monitor Seed Heads: As the dill plant matures, it will develop clusters of tiny yellow flowers called umbels. After pollination, these flowers will give way to green seed heads. Keep an eye on the seed heads as they start to turn brown and dry out, which signals that they are ready for harvest.
- Choose a Dry Day: Select a dry day for harvesting dill seeds to prevent the seeds from getting wet and developing mould.
- Cut Seed Heads: Use clean, sharp scissors or pruning shears to snip off the seed heads. Be gentle to avoid crushing the seeds.
- Collect Seeds: Place the harvested seed heads in a paper bag or over a tray, and let them dry for a week or two in a well-ventilated area away from direct sunlight. As the seed heads dry, the seeds will fall out and can be collected easily.
- Store Seeds: Once the seeds are completely dry, transfer them to an airtight container, such as a glass jar with a tight-fitting lid. Label the container with the date and type of seeds, and store it in a cool, dark place until you’re ready to use them for planting or cooking.
By following these harvesting techniques, you can enjoy the fresh taste of dill leaves and seeds throughout the growing season while keeping your dill plant healthy and productive.
How to Grow Dill in Containers
- Choose a container: Select a container at least 12 inches deep and wide with drainage holes to accommodate dill’s long taproot and prevent waterlogging.
- Fill with well-draining potting mix: Use a potting mix enriched with organic matter or compost for adequate nutrients.
- Plant seeds or seedlings: Follow the planting instructions as described earlier, spacing them appropriately to avoid overcrowding.
- Place in a sunny location: Ensure the container receives 6-8 hours of direct sunlight daily for optimal growth.
- Water regularly: Maintain consistently moist soil, watering more frequently than in-ground dill plants if needed.
- Add mulch: Apply a layer of mulch to the top of the soil to help retain moisture.
- Monitor for pests and diseases: Keep an eye on your dill plants and address any issues promptly to maintain their health.
By following these steps, you can successfully grow dill in containers and enjoy its versatility and flavour in your culinary creations.
Dill Companion Plants
Dill companion plants can provide numerous benefits to your garden, including attracting beneficial insects, repelling pests, and improving overall plant health. In this section, we will discuss some of the best dill companion plants and the advantages they offer.
Vegetables
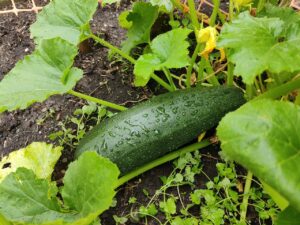
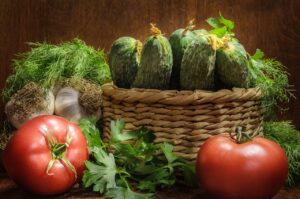
- Cucumbers: Dill attracts beneficial insects that help control cucumber pests, and both plants have similar cultural requirements.
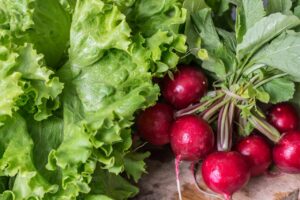
- Lettuce: Both plants have shallow root systems and prefer well-draining soil and consistent moisture.
- Onions: The strong aroma of onions deters pests targeting dill, and dill’s tall growth provides some shade to onions.
- Brassicas (cabbage, kale, broccoli, cauliflower): Dill attracts parasitic wasps that prey on cabbage worms and improves soil structure for shallow-rooted brassicas.
- Corn: Dill attracts beneficial insects that help control corn pests and provides some shade to the base of corn plants.
Flowers
- Cosmos: These flowers attract pollinators and beneficial insects that help improve the overall health of your garden.
- Marigolds: The strong scent of marigolds repels pests like aphids and whiteflies.
- Zinnias: Zinnias also attract pollinators and beneficial insects, contributing to a thriving garden ecosystem.
Herbs
- Basil: Basil and dill have similar growing requirements and can be planted together to save space. The strong aroma of basil can also deter pests from attacking dill plants.
- Chervil: Chervil and dill make a great pairing, as both herbs prefer similar growing conditions and have delicate, feathery foliage that creates an attractive visual display.
- Parsley: Parsley can be planted alongside dill, as both herbs share similar preferences for sunlight, water, and soil conditions. The two herbs can also complement each other in culinary applications.
Plants to Avoid Planting Near Dill
- Carrots: Dill and carrots are not compatible, as dill can attract the carrot rust fly, which damages both crops.
- Tomatoes: Tomatoes should be kept away from dill, as dill can stunt the growth of tomato plants.
By carefully selecting dill companion plants, you can create a thriving garden ecosystem that promotes healthy growth, deters pests, and enhances the overall appearance of your garden. These strategic plant pairings will not only improve your dill plants’ performance but also benefit the surrounding plants in your garden.
Try Our Seeds:
Conclusion
Mastering how to grow dill is a rewarding experience that can enhance your garden and your culinary creations. Our comprehensive guide has covered everything from how to grow dill from seed, how to plant dill, and how to harvest dill seeds without harming the plant. We’ve also discussed the benefits of growing dill in containers, as well as understanding how tall dill grows and how much sun dill needs to thrive. With our dill plant care tips and recommendations for dill companion plants, you’re now well-equipped to cultivate this versatile herb in your garden successfully.