

Last updated: July 13, 2026
🌱 Growing Chives as a Perennial Herb
Most of the herb garden is a yearly rebuild. Basil dies at the first cold night, cilantro bolts and gives up by midsummer, and dill has to be re-sown every spring. Chives do none of that. Plant a clump once and it settles in for the long haul — dying back to nothing in winter, then pushing up thin green spears while the rest of the garden is still bare mud. In much of North America chives are the first fresh, cuttable green thing of the entire year, up and ready weeks before the last frost has even passed. A single planting can feed your kitchen for a decade or more.
That longevity comes from one fact: chives are the allium you grow as a perennial herb rather than a crop. Onions, leeks, and garlic are annual or biennial vegetables — you plant them, harvest the whole plant, and start over. Chives (Allium schoenoprasum) are grown, cut, and used like parsley or thyme: you snip the leaves, the clump regrows, and it returns on its own every spring. They form no usable bulb — just a dense, ever-widening clump of slender hollow leaves. Understand that one difference and everything else falls into place: why you never dig them up, why they self-seed, why they shrug off cold, and why they’re the easiest allium a beginner can grow. This guide covers both kinds worth growing — oniony common chives and garlicky garlic chives — from the slow start in seed trays through years of continuous cutting.
🧅 Common Chives vs Garlic Chives
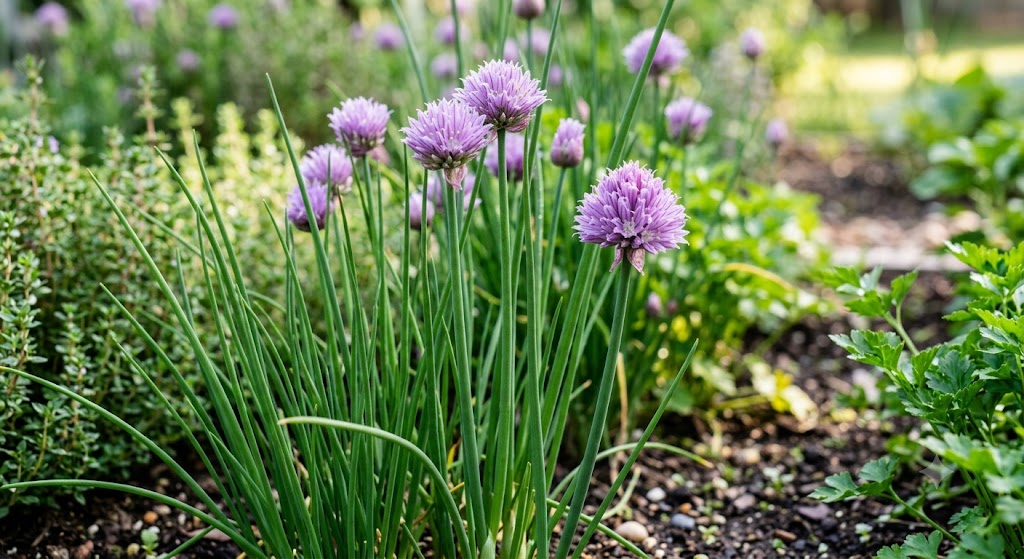
“Chives” actually covers two different plants, and knowing which is which is the first real decision. Common chives are the familiar oniony kind with thin, round, hollow leaves and round purple pompom flowers. Garlic chives — also called Chinese chives or Allium tuberosum — are a separate species with flat, solid, strappy leaves, a distinct mild garlic flavour, and star-shaped white flowers in late summer. Both are perennial, both are cut like herbs, and many gardens grow both. The table lays out how they differ where it matters.
| Feature | Common Chives | Garlic Chives |
|---|---|---|
| Seeds | Common Chive Seeds | Garlic Chive Seeds |
| Botanical name | Allium schoenoprasum | Allium tuberosum |
| Leaves | Thin, round, hollow (like tiny tubes) | Flat, solid, strap-like (like fine grass blades) |
| Flavour | Mild, fresh onion | Mild garlic, subtler than a clove |
| Flowers | Round purple-pink pompoms, late spring | White star clusters, late summer |
| Heat tolerance | Prefers cool; can sulk in extreme heat | More heat-tolerant; better in the South |
| Spreading | Widens steadily; self-seeds if let flower | More vigorous; can self-seed aggressively |
| Best used | Raw garnish, eggs, potatoes, dips | Stir-fries, dumplings, cooked dishes |
For most kitchens, common chives are the default — the bright, oniony green you snip over eggs, baked potatoes, and soups. They’re a little cooler-natured and settle happily into gardens across the northern half of the continent. Garlic chives are the one to add if you cook a lot of Asian food or garden in a hot-summer region, because they bring a gentle garlic note that common chives can’t and hold up better through heat that makes common chives go semi-dormant.
The one honest caution is spread. Both self-seed if you let the flowers mature, but garlic chives are noticeably more enthusiastic about it and can naturalise into places you didn’t invite them, particularly in mild climates. That’s easy to manage — you simply cut the flower stalks off before the seed heads dry and drop — and it’s covered in detail in the flowers and seed-saving sections below. Grown thoughtfully, both are among the most rewarding, lowest-effort plants in the whole garden.
🌿 Chives vs Green Onions, Scallions & Onions
Chives get confused with green onions and scallions constantly, on the plate and in the seed rack, and the confusion leads people to grow the wrong thing. They look vaguely similar — thin green tubes — but they behave completely differently in the garden and belong at different ends of the kitchen. The table sorts the whole slim-green-allium question out.
| Allium Seeds | What It Is | Flavour | In the Garden |
|---|---|---|---|
| Chives | A perennial herb grown for its thin leaves; forms a clump, never a bulb | Mild, fresh onion; delicate | Plant once, cut for years; hardy; raw garnish |
| Green Onion / Scallion | Onions harvested young, before any bulb forms (some are true non-bulbing types) | Sharp, fresh, stronger than chives | Fast annual crop; whole plant pulled; stir-fry, garnish |
| Spring Onion | A bulbing onion pulled young, with a small swollen base | Sharper still | Grown like onions, pulled early; raw, grilling |
| Bunching / Welsh Onion | A perennial, non-bulbing onion (A. fistulosum) forming clumps | Mild to sharp | Clump-forming and hardy like chives, but larger and used as a scallion |
| Onion | The familiar bulb onion (Allium cepa) | Pungent | Day-length sensitive annual; the all-purpose kitchen onion |
The cleanest way to hold it in your head: chives are a herb you cut leaves from forever, while green onions and scallions are a crop you pull whole and replant. Chives are milder and more delicate; a green onion is bigger, sharper, and used by the handful. If you want the punchier, pull-and-use scallion for stir-fries and tacos, that’s the green onion — and our full guide to growing green onions covers that side in detail.
For the bulbing members of the family, the same logic applies at a larger scale: onions and leeks are long-season vegetables you harvest as whole plants, not cut-and-come-again herbs. Grow all three and you’ll have fresh alliums in some form almost year-round.
🔬 Starting Chives from Seed
Chives are easy to grow but slow to start, and the germination stage is where patience pays off. The seed is small and short-lived, so use fresh seed and sow a generous pinch. Start chive seeds indoors 8–10 weeks before your last spring frost. Because a single chive plant is a clump of many thin leaves, you don’t fuss over spacing individual seeds — chives are grown in bunches on purpose, so a whole tuft becomes one transplant and one clump.
- Fill small pots or cells with a moist seed-starting mix and sow 10–15 seeds per cell, barely covered at about 5 mm (¼ in) deep — chives come up as a tuft, not as spaced individuals.
- Keep the mix warm and consistently moist at 18–21°C (65–70°F); germination is unhurried and uneven, usually one to three weeks, so don’t give up on a tray that looks empty after a week.
- Once the fine, grass-like seedlings straighten out of their initial loop, grow them on somewhere bright and cool, adding a grow light if a windowsill leaves them pale and stretched.
- When the tufts are 8–10 cm (3–4 in) tall and hard frost has passed, harden them off over a week of increasing outdoor exposure.
- Plant each tuft out as a single unit, spacing the clumps 15–20 cm (6–8 in) apart.
You can also direct-sow chives outdoors once the soil has warmed in spring, scattering a pinch into shallow drills and thinning to clumps — it works, it’s just slower to give you a usable plant because chives grow so gradually in their first year. Whichever route you take, the first season is mostly about establishing the clump; the real harvests come from year two onward, when the plant is settled and vigorous. For the full technique, see our guide to starting seeds indoors.
🪴 Growing Chives Indoors on a Windowsill
Chives are one of the very best herbs for a bright kitchen windowsill, handing you fresh snippings all winter — exactly when the outdoor clump has died back and the garden is closed for the season. Chives need a few weeks of real cold before they will grow well indoors. A clump lifted from the garden and brought straight into a warm room in autumn will sulk or peter out, because it’s trying to go dormant. Leave the pot outside or in an unheated garage until it has frozen and died back, then bring it into warmth, and it will wake and flush with fresh green as if spring had come early.
For growing indoors from seed, use a deep pot — chives have surprisingly deep, fibrous roots — a good potting mix, and the brightest window you have, or a simple grow light, since short winter days rarely give enough light on their own. Keep the mix moist but never soggy, feed lightly every few weeks, and harvest by snipping rather than pulling. Indoor chives grow more slowly than outdoor ones, so cut lightly and give each clump time to recover. A couple of pots rotated on the sill keep a steady supply going through the darkest months.
| Item | What to Look For | Essential For | Shop |
|---|---|---|---|
| Deep Herb Pots | At least 15 cm (6 in) deep with good drainage holes | Windowsill & container chives | View on Amazon → |
| Grow Light | Full-spectrum LED on a timer | Strong indoor growth through short winter days | View on Amazon → |
| Herb Snips | Sharp, clean, narrow blades | Clean cuts that regrow without browning | View on Amazon → |
| Seed Starting Trays | Cell trays with a humidity dome | Even germination of slow chive seed | View on Amazon → |
🌾 Caring for Chives Through the Season
Chives are wonderfully unfussy, but a good spot and a little routine care keep a clump lush, tender, and productive for years.
Planting Chives: Site & Spacing
Give chives full sun to light shade and a moist, fertile, well-drained soil rich in organic matter, with a near-neutral pH around 6.0–7.0. In hotter regions a little afternoon shade keeps common chives greener through summer. Set transplants or thinned clumps about 15–20 cm (6–8 in) apart; they knit together into a solid edging over a couple of seasons, which is why chives make such a pretty, practical border along a bed or path. A generous handful of compost worked in at planting is all the feeding a new clump needs to establish.
Watering Chives
Water in dry spells to keep the leaves lush and tender, since drought-stressed chives turn tough and go semi-dormant. In humid regions water at the base rather than overhead, where wet foliage invites rust and mildew, and mulch to hold moisture and keep weeds down. Chives in containers dry out faster than those in the ground, so check pots often.
Fertilizing Chives
Feed lightly: a topdressing of compost or a balanced fertiliser in spring as growth restarts keeps a clump productive, and that’s usually all it needs. Heavy feeding mostly makes soft, floppy leaves and weaker flavour. The single most useful habit is simply to keep cutting — regular harvesting triggers fresh, tender regrowth, so a clump you use often stays far nicer than one you neglect. Left alone, a clump gradually gets congested and woody in the centre, which is the cue to divide it, covered later in this guide.
🌡️ Growing Chives Across North American Climates
Chives grow in nearly every corner of the continent — they’re that adaptable — but what challenges them shifts completely from region to region. The blanket advice (“full sun, rich soil, keep it watered”) is true everywhere and not much help anywhere in particular. The three boxes below cover the climate realities most North American chive growers are actually working within, and the adjustment that matters in each.
Where: Canada Zones 2–5 · ND, MN, MT, WY, CO (elevation) · Upper Midwest & Mountain West.
The challenge: Not survival — chives are hardy to Zone 3 and shrug off deep cold. The real issue is that the clump dies back completely and the fresh-herb supply stops for months.
The adjustment: This is chive country — they’ll be your earliest spring green, often up through the last snow. To bridge winter, force a potted clump indoors: let it freeze and go dormant outside first, then bring it into warmth. Freeze a summer surplus so you’re never without.
Where: Southeast US · Gulf Coast · Mid-Atlantic · Southern Ontario · Pacific Northwest.
The challenge: Humidity and crowding invite fungal problems — rust and downy mildew on the leaves — and damp, dense clumps stay wet and prone to rot at the base.
The adjustment: Space clumps for airflow, water at the base rather than overhead, and divide congested clumps so air moves through them. Cut a rust-marked clump right down and let it flush clean. Garlic chives handle Southern heat and humidity better than common chives here.
Where: Southwest US · Southern Plains · Texas · Low Desert (AZ, NV, CA South) · BC Interior.
The challenge: Intense heat and dry soil push common chives into a tough, semi-dormant sulk, and the leaves turn wiry and bolt to flower fast.
The adjustment: Give afternoon shade, mulch heavily, and water deeply and consistently. Treat the cool half of the year as the main chive season and expect a summer lull. Garlic chives are the more heat-tolerant choice for the hottest gardens.
🗺️ Planting Chives by Zone
Because chives are a hardy perennial, the “when” is less about a narrow planting window and more about getting the clump started so it can settle in before its first winter. Start chive seed indoors in late winter, plant out after your last frost, and from year two the clump returns each spring on its own. The dates below are approximate and shift with the season, but the pattern holds across the continent.
| Zone / Region | Start Seed Indoors | Plant Out | Harvest Window |
|---|---|---|---|
| Zones 2–3 — Prairies, north MB-SK, ND/MN, MT | Feb–Mar | Late May–Jun | May–Oct outdoors; windowsill pot through winter |
| Zones 4–5 — AB, QC, ON north · WI, MI, MN, NY | Feb–Mar | Mid May–Jun | Apr–Nov outdoors; force a pot indoors in winter |
| Zones 6–7 — ON/QC south, BC coast · PA, OH, VA, OR/WA | Jan–Mar | Apr–May | Mar–Dec; nearly year-round in the mildest spots |
| Zones 8–9 — Southeast, Gulf, TX, CA | Fall or late winter | Fall or early spring | Year-round; a summer lull for common chives |
| Zones 10–11 — FL south, CA south, low desert | Fall | Fall | Cool season; garlic chives handle the heat best |
The single most valuable habit in any cold or temperate zone is to leave the clump right where it is — chives are one of the few edibles you truly plant once. In Zone 8 and warmer, common chives may pause in the peak of summer heat rather than winter; that’s normal, and cutting them back with a good watering usually brings a fresh flush once the worst heat breaks. To line up chive sowing with the rest of your beds, use the complete planting calendar.
✂️ Harvesting Chives for Continuous Cutting
Harvest chives by cutting whole leaves low, about 3–5 cm (1–2 in) above the soil, rather than shearing across the top. You can begin once a clump is well established and reasonably full — usually its second season from seed, though a strong first-year clump will spare a few snips. Cutting low with scissors or snips triggers clean fresh regrowth from the base, where trimming just the tips leaves a clump of blunt, browning stubs that never look quite right.
The one rule worth remembering is to take no more than about a third of a clump at once, so the plant keeps enough leaf to power its recovery. Work around a clump, or across several clumps, taking a little from each, and you’ll have a steady supply that regrows within a couple of weeks all season long. If a whole clump gets tired, tough, or scruffy by midsummer, don’t nurse it — shear the entire thing down to a few centimetres, water it well, and it will push up a flush of tender new leaves. That hard reset is a feature, not a failure, and it’s the best way to refresh chives that have flowered or been hit by heat.
Slim, soft, bright-green leaves. The sweetest, most tender stage — cut freely, but leave a third of the clump to keep it powering back.
Full, upright leaves 15–25 cm tall before any flower buds. Peak flavour and yield — cut low with snips for clean regrowth.
Leaves toughen and turn oniony-strong as the clump flowers. Enjoy the edible blooms, then shear the whole clump down for a tender new flush.
💜 Chive Flowers & Blossom Vinegar
Chive flowers are one of the garden’s quiet delights, and turning a flush of them into vinegar is one of the best reasons to let a few clumps bloom.
Are Chive Flowers Edible?
Both the purple pompoms of common chives and the white stars of garlic chives are edible and taste like a milder version of the leaves. Common chives bloom in late spring, garlic chives in late summer, and both are loved by bees and butterflies. The purple pompoms pull apart into individual florets that scatter over salads, soft cheese, and eggs like edible confetti with a gentle onion bite. The trade-off is that flowering diverts the plant’s energy and toughens the leaves, and blooms left to set seed will sow themselves all over the bed. Let some clumps flower for beauty and bees while shearing others before they bud so you always have tender leaves, and snip off spent heads before the seed dries unless you want the volunteers.
How to Make Chive Blossom Vinegar
Chive blossom vinegar is a jewel-pink, mild-onion vinegar that’s superb in vinaigrettes and takes about one to two weeks to steep.
- Gather freshly opened purple blossoms on a dry day, rinse them gently, and shake dry, then loosely fill a clean glass jar with the flower heads.
- Pour warmed (not boiling) white wine vinegar over the blossoms to cover, and cap the jar with a non-metal lid.
- Steep out of direct light for one to two weeks, until the vinegar turns a deep rosy pink.
- Strain out the flowers and bottle the vinegar, then store it in a cool, dark cupboard.
🐛 Chive Pests & Problems
Chives are among the most trouble-free plants you can grow — their oniony scent actively repels many pests, which is exactly why they’re such valued companions. The few issues that do come up are mostly about damp, crowding, and heat rather than insects. The table pairs the symptom you’ll actually see with its cause and an organic fix. For broader, cross-crop detail, see our organic pest control guide.
| Problem | Symptoms | Likely Cause | Organic Fix |
|---|---|---|---|
| Orange-rusty spots on leaves | Bright orange pustules and streaks over the foliage | Allium rust (fungal; humid, crowded, wet conditions) | Cut the clump right down and let it regrow clean; divide congested clumps for airflow; water at the base, not overhead; avoid heavy nitrogen. |
| Pale, fuzzy grey patches | Yellowing leaves with soft, greyish mould in humid spells | Downy mildew | Improve airflow and drainage, remove affected leaves, and shear back to encourage fresh dry growth; ease off overhead watering. |
| Silvery streaks and flecks | Fine silver-white stippling on leaves, worst in hot, dry weather | Onion thrips | Hose off, use insecticidal soap, encourage predatory insects, and keep plants watered so they aren’t heat-stressed. |
| Sticky, curled leaf tips; clusters of tiny bugs | Small green or grey insects massing on soft new growth | Aphids (uncommon on chives, but possible on stressed plants) | Blast off with water or use insecticidal soap; usually the chive’s own scent keeps them away, so treat it as a sign of a stressed clump. |
| Seedlings collapse at the base | Fine young seedlings flop over and rot at soil level | Damping-off (fungal; overwet, airless seed trays) | Sow in fresh sterile mix, don’t overwater, give good airflow and light, and water from below to keep the surface drier. |
| Tough, wiry leaves; strong flavour | Leaves go stringy and harshly oniony, often with flower buds | Flowering, heat stress, or an old congested clump | Shear the whole clump down and water well for a tender new flush; give afternoon shade in heat; divide clumps every few years. |
| Woody, bare centre to the clump | A dead, congested middle with leaves only around the edge | Clump has aged and become overcrowded | Lift and divide in spring or fall, discarding the tired centre and replanting the vigorous outer sections (see dividing, below). |
🌿 Companion Planting for Chives
Chives are one of the great companion plants — their scent confuses and deters a long list of pests, and their flowers pull in pollinators and predatory insects — which makes them worth tucking throughout the garden rather than keeping in one corner. The main thing to avoid is planting them right against legumes, which alliums are traditionally said to hold back. For the full herb reference, see our herb companion planting chart.
| Companion Seeds | Relationship | Benefit / Mechanism |
|---|---|---|
| Carrots | ✔ Excellent | The chive’s onion scent helps mask carrots from carrot fly — the classic allium-and-carrot partnership at herb scale. |
| Tomatoes | ✔ Excellent | A traditional companion said to deter aphids and improve the tomatoes nearby; the flowers also draw pollinators to the patch. |
| Roses | ✔ Excellent | The famous pairing — chives planted around roses are credited with discouraging aphids and helping against blackspot. |
| Cabbage, kale & broccoli | ✔ Good | The allium scent helps mask brassicas from cabbage-family pests; a useful, non-competing neighbour. |
| Apples & fruit trees | ✔ Good | A perennial underplanting around trunks that’s said to deter pests and add early pollinator flowers. |
| Peas & beans | ✘ Avoid | Alliums are traditionally said to inhibit legumes; keep chives away from the bean-and-pea family. |
🍳 Chives in the Kitchen
Chives are a finishing herb, and the golden rule is to add them raw or at the very last moment. Their flavour is delicate and volatile — a gentle, fresh onion note — and long cooking drives it off entirely, leaving limp green threads that taste of nothing. So you snip them over a dish just before serving rather than simmering them in: scattered on scrambled eggs and omelettes, folded through soft cheese and sour cream, sprinkled over baked potatoes, soups, and salads, or stirred into butter and dressings. That last-second freshness is the whole point of growing your own, because chives lose their spark fast once cut and are never as good from a shop.
Garlic chives are the exception that likes a little heat: their milder-garlic flavour holds up better in cooking, which is why they go into stir-fries, dumpling fillings, and noodle dishes where common chives would fade. Snipping chives with scissors straight over the plate is the easiest approach and bruises them less than chopping. Don’t forget the flowers, either — pulled into individual florets, they make a beautiful, mildly oniony garnish, and a few scattered over a plate turn an ordinary dish into something that looks like it came from a restaurant.
🫙 Storing & Preserving Chives
To preserve chives, freeze them rather than drying — dried chives lose almost all their flavour. Chives are a fresh herb through and through, and nothing preserved ever quite matches a handful snipped minutes before it hits the plate, which is the best argument for keeping a living clump or windowsill pot going year-round. Fresh-cut chives last about a week in the fridge, loosely wrapped in a slightly damp paper towel inside a bag, or standing stems-down in a little water like cut flowers.
For longer storage, snip fresh chives, spread them on a tray to freeze, then bag them, or pack chopped chives into ice-cube tray compartments topped with water or olive oil and freeze into ready-to-use portions that drop straight into cooking. Frozen chives soften and are no good raw as a garnish, but they keep their flavour well for soups, omelettes, and sauces through the winter. Dried chives, by contrast, turn to flavourless green flecks — one of the few herbs genuinely not worth drying.
Fridge: about 1 week, loosely wrapped in a damp paper towel, or stems standing in a little water.
On the windowsill: the best “storage” — a forced pot indoors gives fresh chives all winter (see the windowsill section).
Freeze: snip and freeze on a tray, then bag; or freeze in oil/water ice cubes for cooking. Keeps flavour for months.
Drying: not recommended — chives lose nearly all their flavour dried. Freeze instead.
🌍 A Short History of Chives
Chives are one of the oldest herbs in human use and one of the very few culinary plants that grow wild across the entire Northern Hemisphere — which gives them an unusual place in the story of both the Old World and the New.
Chives have been gathered and used for thousands of years across Europe and Asia. Garlic chives were cultivated in China well over two thousand years ago, and common chives grew wild and foraged across the ancient world long before they were ever deliberately planted — a herb humans simply picked where it stood.
Unusually for a kitchen herb, common chives are genuinely native to North America as well as Eurasia, growing wild in cool, moist ground across the northern United States. European settlers brought cultivated strains with them, but the plant was already here — one of the rare herbs at home on both continents.
Wild chives range far across Canada, thriving in exactly the cool, damp conditions the plant loves. Their extreme hardiness made them a natural fit for northern kitchen gardens, where they became a dependable perennial — the first green up in spring and a fixture of the cottage-garden herb patch.
🌱 Dividing Chives
Divide a chive clump every three or four years, when it gets congested and starts to die out in the middle. Because chives are a clumping perennial, division is the easiest way to get more plants and doubles as essential maintenance. Lift the whole clump in spring or early autumn, pull or cut it into several smaller fistfuls of roots and leaves, discard the tired centre, and replant the healthy outer sections at their normal spacing, watering them in well. Each piece grows away into a full clump, so one plant quickly becomes a row, an edging, or gifts for gardening friends — free plants for a few minutes’ work.
🌱 Saving Chive Seeds
Saving seed is the other way to multiply chives, and here the perennial herb behaves like a biennial: let a clump flower, and the spent purple or white heads dry into papery capsules full of small black seeds you can rub out and store once crisp. Chive seed is short-lived, so sow it within a year or two for reliable germination. Different varieties flowering nearby will cross, though common chives and garlic chives, being separate species, won’t cross with each other. Both are open-pollinated and come true from carefully saved seed. Any flowers you don’t harvest will happily self-sow, so deadhead the clumps you want to keep contained. Our complete seed-saving guide covers drying, isolation, and viability testing in detail.
📚 Related Guides
The punchier, pull-and-use cousin of chives — another allium you can grow to cut again and again.
The bulbing side of the allium family — master onions and you’ve covered the whole rack alongside your chives.
The winter-hardy allium you harvest from under the snow — a natural companion crop to a chive patch.
Chives are one of the best companion herbs — see what to plant them beside for pest-free, pollinator-friendly beds.
Pin down your chive sowing and every other crop’s timing, zone by zone across North America.
The full seed-saving process, including the flowering, isolation, and short viability that chive seed needs.


