

Last updated: July 16, 2026
Growing Peas for Shoots, Sprouts & the Garden
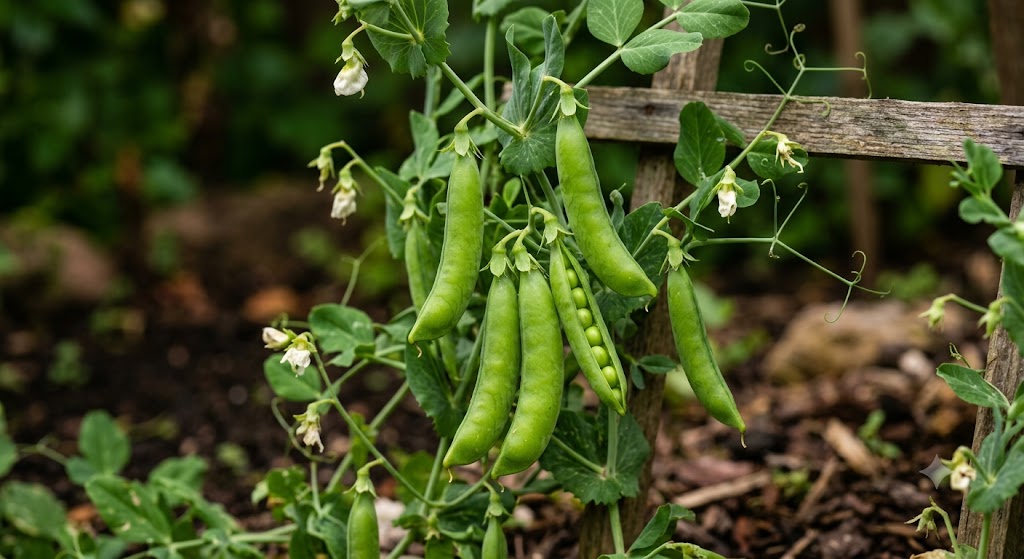
Peas (Pisum sativum) are a cool-season annual legume and one of the very first plants humans ever farmed — and one of the few crops that earn their keep four completely different ways from the same bag of seed. On the kitchen counter, whole peas become crisp, sweet sprouts in a jar in two to three days, or tall, tendrilled pea shoots on a tray inside of ten. In the garden, they climb a trellis through a cool spring or fall and hang heavy with sweet pods. And broadcast across a bare bed, field peas work as a nitrogen-fixing cover crop that feeds the soil for whatever follows.
This guide covers all of it, in depth: jar sprouts, windowsill pea shoots and microgreens, the full garden crop from sowing to harvest, hand-saving your own seed, and cover-cropping. One rule sits underneath everything, so it is worth saying up front: only whole peas will sprout or grow. The split peas in the soup aisle have had their seed coat and embryo cut away, so they will never wake up — start with whole seed and the rest of this guide works.
Pea Varieties
The pea you choose decides whether you shell it, snap it whole, or grow it as a green on a tray. The table sorts the field into the three garden types plus the whole seed grown for sprouts and shoots, including the varieties we stock.
| Pea Seed Variety | Type | Pods & Eating | Best For | Height & Support |
|---|---|---|---|---|
| Shelling (English) peas | Shelling | Fibrous pod discarded; shell out the sweet round peas inside | Fresh peas, freezing, dry soup peas | 60–210 cm (2–7 ft); most need a trellis |
| Sugar snap peas | Snap | Plump edible pod eaten whole, pod and peas together | Fresh snacking, stir-fries, salads | 75–180 cm (2.5–6 ft); needs support |
| Avalanche snow pea seeds | Snow | Flat, tender pod picked whole before the peas swell | Stir-fries, fresh eating, high yields | 90 cm (3 ft); light support |
| Dwarf Grey Sugar pea seeds | Snow (dwarf) | Tender snow pods; purple flowers; leafy tips prized as pea shoots | Small gardens, containers, pea shoots | 60–75 cm (2–2.5 ft); minimal support |
| Oregon Sugar Pod pea seeds | Snow | Large, flat snow pods in heavy sets; doubles as a sprouting pea | Snow pods plus sprouts and shoots | 75 cm (2.5 ft); light support |
| Green sprouting pea seeds | Whole / field | Whole peas; the sweetest, crunchiest raw sprout | Beginner jar sprouts, shoots & a cover crop | Indoor trays; no support |
| Speckled pea seeds | Whole / field | Whole peas; tall, straight-stemmed shoots | Pea shoots & microgreens — the shoot standard | Indoor trays; no support |
| Yellow pea seeds | Whole / field | Whole peas; fast sprout, tendril-rich shoots | Quick jar sprouts & twirly pea shoots | Indoor trays; no support |
Browse all pea seeds → · Shop organic sprouting seeds →
For the garden, the choice comes down to how you like to eat a pea. Shelling peas give you the classic sweet green pea for the pot or the freezer but ask you to shell every pod; sugar snaps hand you a plump, sweet pod you eat whole; and snow peas give a flat, tender pod picked young for the wok. Snap and snow types skip the shelling entirely, which is why they earn most of the trellis space in a small garden. Height is the other deciding factor — dwarf and bush types under 75 cm (30 in) stand with little help, while tall vining types run 1.5–2.4 m (5–8 ft) and demand a proper trellis from day one.
For sprouting and pea shoots, the type barely matters as long as the seed is whole — any whole pea will sprout, and speckled, green, and dwarf snow peas all throw sweet, tendrilled shoots. What you cannot do is sprout split peas: the moment a pea is hulled and halved for the soup pot, the living embryo is gone. Buy whole seed sold for sprouting or planting and you are set for every method below.
🌱 Sprouting Peas in a Jar
Sprouting is the fastest way peas earn a place on the counter: a jar, water, and a couple of days turn dry seed into a living food you eat raw. Whole peas sprout in 2–3 days in a jar with nothing but rinse water, and a half-cup of dry seed yields roughly two cups of crunchy sprouts.
How to Sprout Peas in a Jar
The jar method is the whole technique — soak, then rinse twice a day until short tails appear. Start with whole seed and a clean jar, and follow these six steps.
- Measure ½ cup (100 g) of whole peas into a clean wide-mouth quart jar, then pick out any split, shrivelled, or cracked seeds — only intact seed will sprout.
- Cover with two to three times their volume of cool water and soak 6–12 hours or overnight; the peas roughly double in size as they drink.
- Drain the jar completely, fit a mesh or sprouting lid, and rest it mouth-down at a 45° angle in a bowl so the last water runs out while air still reaches the seed.
- Rinse and drain with cool water twice a day, morning and night, keeping the jar out of direct sun at normal room temperature, 18–21°C (65–70°F).
- Short white tails show within a day; harvest once they reach 6–13 mm (¼–½ in), usually on day 2 to 3 — shorter for a sweet snap, longer for a nuttier bite.
- Give a final rinse, spread the sprouts on a towel to drain for 30–60 minutes, then refrigerate in a loosely lidded container for up to 5–7 days.
Pea sprouts are mild, sweet, and juicy — toss them raw into salads, sandwiches, and wraps, or fold them into a stir-fry at the very end so they keep their snap. Once the twice-a-day rhythm clicks, it carries straight over to every other jar in how to grow sprouts at home.
Are Pea Sprouts Safe to Eat Raw?
Pea sprouts and shoots are safe to eat raw, as long as you keep the jar clean and rinse twice a day. The warm, damp conditions that sprout a seed can also grow bacteria, so hygiene is the safety measure: start with certified seed, use a scrubbed jar, rinse on schedule, drain fully so water never pools, and refrigerate the moment they are done. Give them a sniff before eating — fresh sprouts smell green and neutral, while a sour or musty odour means the batch went wrong and belongs in the compost. Anyone pregnant, very young, elderly, or immunocompromised should lightly steam sprouts rather than eating them raw, which keeps the nutrition and removes the risk.
🌿 Growing Pea Shoots
Pea shoots are ready to cut in 7–10 days on a shallow tray of soil, giving sweet, tendrilled greens that taste exactly like a fresh pea pod. Pea shoots and pea microgreens are the same crop under two names — the whole pea grown a little longer than a sprout and cut at the stem rather than eaten whole. They are the single most rewarding thing you can grow indoors, no garden required.
Growing Pea Shoots on a Tray
The tray method takes a soaked handful of whole peas to a dense mat of greens in a week to ten days. A shallow tray, an inch of soil, and a bright windowsill are all it asks.
- Soak ½ cup or more of whole peas in cool water for 6–12 hours or overnight, then drain, exactly as you would to start sprouts.
- Spread the soaked seed densely across 2.5–5 cm (1–2 in) of moist potting mix in a shallow tray, close enough to touch but not piled up.
- Cover and keep dark and warm for the first 3 days, misting to hold humidity while the seed roots into the soil.
- Uncover and move to bright light or a grow light for 8–12 hours a day, watering from below once daily so the leaves stay dry.
- Harvest at day 7 to 10, when the shoots stand 8–15 cm (3–6 in) tall, by cutting the stems just above the soil with scissors; store unwashed in the fridge for up to a week.
Peas are one of the most forgiving greens to start with, and the same tray method carries straight over to sunflower, radish, and broccoli — the full range is in how to grow microgreens.
Getting a Second Cut of Pea Shoots
Pea shoots regrow for one more, smaller harvest if you cut above the lowest leaf node instead of at the soil. Peas carry so much stored energy in their big seed that the stem can push new growth from the node you leave behind. Cut the first flush high, keeping one or two of the lowest leaves on each stem, then keep the tray watered and lit as before. A lighter second cutting follows in about a week — after that, the tray is spent, so compost the root mat and start fresh. The second flush is smaller and softer, so most growers simply resow every week or two for a steady supply rather than pushing a tray for a third cut.
Before You Grow Peas in the Garden
Everything above grows on a windowsill; the outdoor garden crop is a different project — still an easy one, but with its own needs. Peas want full sun, loose soil, and cool weather, and give back a crop plus a nitrogen boost to the bed. Get the site and seed prep right before you sow.
Soil & Site for Peas
Peas need full sun of at least 6 hours and loose, well-drained soil with a near-neutral pH of 6.0–7.5. They tolerate part shade, especially where spring warms fast, but pods come thickest in full sun. What they will not forgive is waterlogging — heavy, soggy clay rots the seed and invites root disease, so raised beds or amended, free-draining ground pay off. A lean soil is fine because the plants make much of their own nitrogen; work in a little compost for structure, hold back on rich manure, and pick a spot you can rotate out of legumes for a few years to keep soil disease down.
Inoculating Pea Seed
Inoculating pea seed with Rhizobium leguminosarum bacteria lets the plant pull its own nitrogen from the air, and it is the one optional step worth doing. The bacteria colonise the roots, form nodules, and trade fixed nitrogen for sugars — feeding the crop and leaving the bed richer than they found it. On planting day, dampen the seed, roll it in the powdered pea-and-lentil inoculant until coated, and sow right away while the culture is alive. You can skip it and the plants will still grow, but yields run lower and you lose the soil-building payoff. It is the same partnership that powers how to grow lentils, the pea’s closest kitchen-garden cousin.
How to Grow Peas from Seed
Peas are cool-season plants, so timing beats fussing — get them in early, give them something to climb, and they largely run themselves. Nearly everyone direct-sows peas because they resent transplanting, but a short indoor start is worth it in cold, wet springs; both routes are below.
Direct-Sowing Peas Outdoors
Direct sowing is the standard route and the simplest, since peas germinate in cool soil and young plants shrug off light frost to about −4°C (25°F). Sow as soon as the ground is workable rather than warm.
- Sow 4–6 weeks before your last spring frost, as soon as the soil can be worked and its temperature reaches at least 4°C (40°F); germination is fastest at 10–18°C (50–65°F).
- Plant inoculated seed 2.5 cm (1 in) deep, dropping one seed every 2.5–5 cm (1–2 in) along the row.
- Set a trellis or netting in place at sowing for anything but dwarf types, running a double row about 5 cm (2 in) apart up each side of the support.
- Firm the soil and water once to settle it; keep the bed evenly moist and seedlings emerge in 7–14 days. Peas need no thinning.
Starting Peas Indoors
An indoor start buys short-season and wet-spring gardeners two or three weeks and protects seed from cold, rotting ground. Sow into deep cells or paper pots you can plant intact, because peas hate having their roots disturbed.
- Start seed indoors 3–4 weeks before you plan to transplant, sowing into deep cells, soil blocks, or paper pots so the whole plug goes out without tearing roots.
- Plant two inoculated seeds per cell at a depth of 2.5 cm (1 in) in a light, moist seed-starting mix, then keep the stronger seedling.
- Keep the mix around 18–21°C (65–70°F); seedlings emerge in 7–10 days and want bright light the moment they surface, or they stretch and flop.
- Harden off over 7–10 days, then transplant while the weather is still cool, spacing plants 5–8 cm (2–3 in) apart along the trellis.
From there peas largely look after themselves — a cool-season crop that asks only for water, a support to climb, and regular picking once the pods arrive.
Growing Peas Across North American Climates
Peas are grown from the Canadian Prairies to the desert Southwest, but the same seed needs different handling depending on the season you are working with. Match your approach to the climate you garden in.
Applies to Canadian Zones 2–5 (Prairies, Northern Ontario, Quebec), the US Upper Midwest, Northern Plains, and Mountain West. This is prime pea country — cool springs are exactly what peas want. Sow the moment the soil can be worked, even weeks before the last frost, and choose fast 55–65-day types so the crop finishes before summer heat arrives.
Applies to the Southeast US, Gulf Coast, Mid-Atlantic, Southern Ontario, and Pacific Northwest. Humidity drives powdery mildew and aphids on peas. Space plants for airflow, water at the base, and choose mildew-resistant varieties, then pick promptly and pull spent vines the moment they finish to break the disease cycle.
Applies to the Southwest US, Southern Plains, Texas, Low Desert (AZ, NV, Southern CA), and BC Interior. Heat above 27°C (80°F) at bloom stops pods from setting. Grow peas as a fall and winter crop, sowing as the worst heat breaks, and mulch to cool the roots and hold moisture through flowering.
Planting Peas by Zone
Because peas are a cool-season crop, the calendar shifts from a spring sowing in the north to a fall-and-winter sowing in the warmest zones. Find your band for the timing that keeps flowering out of the summer heat.
| Zone / Region | When to Sow (Spring) | Fall / Second Window | Harvest Window | Key Adjustment |
|---|---|---|---|---|
| Zones 2–4 — Prairie Canada (SK, AB, MB), Montana, North Dakota, Minnesota | Late April–May, once soil hits 4°C (40°F) | Late summer for a shoot crop only | July–August | Sow as early as the soil works; pick fast 55–65-day types |
| Zones 5–6 — Southern Ontario, Quebec, Great Lakes, New England, Idaho | Late March–April | Sow again early–mid August | June–July, and again September–October | Two crops a year; time the fall sowing ~10 weeks before hard frost |
| Zones 7–8 — Mid-Atlantic, mid-South, Pacific NW, Northern California | February–March | September | May–June, and again November | Sow as early as the soil works to beat summer heat |
| Zones 9–11 — Low Desert SW (AZ, NV), Southern CA, Gulf Coast, South Texas | October–January | — | February–April | Grow as a cool-season winter crop; skip summer entirely |
Caring for Peas Through the Season
Once peas are up and climbing, in-season care is light. Water with a purpose, keep the nitrogen away, give the vines something to hold, and watch for powdery mildew as the weather warms.
Watering Peas
Peas need about 2.5 cm (1 in) of water a week, and the water that matters most falls during flowering and pod-fill. Keep the bed evenly moist from germination onward, then water deeply once or twice a week rather than lightly every day, letting the top 2–3 cm (1 in) dry between waterings. A run of dry soil while the pods are filling gives you tough, starchy peas and a smaller crop, so this is the one window not to miss. Water the soil rather than the foliage — wet leaves in warm, humid weather are an open door to powdery mildew — and lay down a mulch to hold moisture and keep the roots cool.
Fertilizing Peas
Peas make their own nitrogen, so skip nitrogen feeds entirely — extra N grows leaf and vine at the cost of pods. If your soil is truly poor, a modest dose of phosphorus and potassium or a little compost worked in before sowing is plenty; the inoculated roots handle the rest. This is the opposite of feeding a tomato, and it is why peas leave a bed richer than they found it. Save the fertilizer budget for the heavy feeders that follow them in rotation.
Trellising & Supporting Peas
Give tall and vining peas a 1.2–2.4 m (4–8 ft) trellis at sowing; only true dwarf types under 75 cm (30 in) stand on their own. Peas climb by twining tendrils that grab anything thin — netting, chicken wire, twiggy pea brush, or string run between stakes all work, as long as the support is in place before the seedlings reach for it. Keeping the vines off the ground is not just tidiness: it lifts the pods into the air where they stay clean and dry, improves airflow that holds mildew at bay, and makes picking far faster. Even bush peas crop better leaning on a short length of brush than sprawling flat on the soil.
Managing Powdery Mildew on Peas
Powdery mildew shows as a white, dusty coating on leaves in late spring, driven by warm days and cool, humid nights. It is the season-ending disease for peas, spreading fast once the weather turns and robbing the plant of the leaf it needs to fill pods. Head it off with airflow — full spacing, a trellis, and water aimed at the soil, not the leaves — and choose mildew-resistant varieties where summers turn muggy. At the first white patches, strip the worst leaves and treat with a potassium-bicarbonate or diluted-milk spray; a broader organic playbook is in organic pest control for the vegetable garden. Once a planting is heavily hit late in the season, the better move is often to pull it, since a fall sowing will outrun the disease.
Troubleshooting Pea Problems
Most pea trouble traces back to cold wet soil, too much nitrogen, summer heat, or a warm humid spell. Match the symptom to its cause and fix below.
| Problem | Likely Cause | Fix |
|---|---|---|
| Seed rots or never emerges in the bed | Sown in cold, wet soil or planted too deep | Sow 2.5 cm (1 in) deep once soil is above 4°C (40°F); improve drainage or start indoors |
| Whole jar of peas never grows tails | Split or hulled seed, or old dead seed | Use only whole, unhulled seed and buy fresh, current-season stock |
| Tall leggy vines with lush leaf but few pods | Too much nitrogen, or too much shade | Never feed nitrogen; move to full sun of 6+ hours |
| Flowers drop and pods fail to set | Heat above 27°C (80°F) during bloom | Sow earlier or as a fall crop so flowering finishes before peak heat; mulch to cool roots |
| White, dusty coating on leaves that spreads fast | Powdery mildew from warm days and humid nights | Space for airflow, water at the base, grow resistant types; spray potassium bicarbonate early |
| Curled, deformed growing tips with sticky residue | Pea aphids, which also spread virus | Blast with water and treat with insecticidal soap; encourage ladybugs and lacewings |
| Small maggots and holes inside the pods | Pea moth larvae hatching onto flowers | Float row cover over the crop at flowering; shift to very early or late sowings to dodge the moth |
| Pods turn tough, starchy, and dull | Left on the vine too long past their peak | Pick every 1–3 days at peak; harvest snow pods flat and snap pods glossy and plump |
Best Companion Plants for Peas
As a nitrogen-fixer, peas give more than they take, which makes them a generous neighbour for hungry, quick crops — with one firm exception. Keep them well away from the onion family. For the full picture, see the vegetable companion planting chart.
| Companion Seeds | Relationship | Why It Works (or Doesn’t) |
|---|---|---|
| Carrots | ✔ | Deep roots loosen soil and use the nitrogen peas fix; no competition above ground |
| Cucumbers | ✔ | Shallow feeders that draw on fixed nitrogen and can share the same trellis |
| Radishes | ✔ | A fast catch crop that matures between the pea rows before the vines fill in |
| Lettuce & spinach | ✔ | Cool-season greens that thrive in the light shade cast by climbing pea vines |
| Corn | ✔ | Tall stalks lend late peas light support and feed on the nitrogen left behind |
| Mint & aromatic herbs | ✔ | Scent confuses aphids and pea moth; keep vigorous mint in a pot nearby |
| Beans | ⚠️ | Both legumes; packing them tight invites shared disease and pests — rotate instead |
| Onions, garlic & leeks | ✘ | Alliums release organosulfur compounds that stunt legumes — keep 60–90 cm (2–3 ft) away |
Harvesting Peas
Peas reward regular picking more than almost any crop — the more you take, the more the vine sets, so plan to walk the row every day or two once pods appear. When and how you pick depends on the type you grew.
Picking Shelling, Snap & Snow Peas
Pick snow peas flat and young, snap peas plump but still glossy, and shelling peas once the pods are rounded and bright green. Snow peas are ready first, harvested while the pod is still flat and the peas inside are just pinpricks; wait and they turn fibrous. Snap peas are best when the pod has filled and swelled but still snaps crisply, before it dulls or the seams toughen. Shelling peas want a few more days, until the pod is fat and cylindrical but before it fades to a dull, waxy green that signals starchy peas. Hold the vine with one hand and pull the pod with the other so you do not tear the plant, and clear every ripe pod each pass to keep the vine producing.
Keeping Picked Peas Sweet
Peas start converting their sugar to starch within hours of picking, so chill them the moment they come off the vine. This is the whole reason a homegrown pea tastes sweeter than anything from a shelf — you eat it before the sugar fades. Harvest in the cool of the morning, get the pods into the fridge fast, and eat or freeze them the same day for peak flavour. To freeze, shell or trim, blanch for 60–90 seconds, plunge into ice water, then bag and freeze; the brief blanch locks in the sugar and colour that would otherwise drain away in storage.
Harvesting Dry Peas for Soup & Seed
For dry peas and soup peas, leave the pods on the vine until they turn tan-brown and rattle, about 3–4 weeks past the fresh-eating stage. Stop watering as the pods dry, then pull whole plants once most pods are papery and cure them somewhere dry and airy for a week or two until the peas are hard. Shell by hand for a small batch, or thresh a bigger one by treading the dried plants in a clean bag and winnowing the chaff off in a breeze — the same pod-by-pod dry harvest covered in how to grow beans. Store the hard, dry peas airtight in a cool, dark place, where they keep for years as soup peas or next season’s seed.
🌱 Growing Peas as a Cover Crop
Field peas work as a cool-season legume cover crop, fixing 90–150 lb of nitrogen per acre and terminated at flowering for the biggest soil payoff. Broadcast them across a bare bed to smother weeds, hold soil, and leave behind a nitrogen charge for whatever follows — a job they do quietly while you plan the next planting.
For a garden bed, inoculate the seed and broadcast it thickly, aiming for roughly one seed every 2.5 cm (1 in), then rake in and water; peas are often mixed with oats, which give the vines something to climb and add fast biomass. Sow in early spring as a pre-season green manure, or in late summer where winters are mild enough to carry a fall stand — Austrian winter peas are the classic overwintering type. The timing of termination is everything: nitrogen peaks in the leaves and stems at flowering and then drains into forming seed, so mow or turn the crop under at first bloom to bank the most nitrogen. In cold regions the peas simply winterkill, leaving a soft residue to plant into come spring. To slot peas into a fuller rotation of legumes, grasses, and brassicas, see the ultimate guide to cover crops and green manures.
Peas pair well with oats, vetch, and clover for a balanced green manure that fixes nitrogen and builds biomass at once.
How to Save Pea Seeds
Peas self-pollinate and come true from saved seed, so saving your own is as simple as letting the best pods finish and dry on the vine. Leave a few strong, healthy plants unpicked and let their pods ripen fully to tan-brown and papery, then pull the plants and cure them somewhere dry and airy until the peas inside are rock-hard. Shell out the seed, dry it a few extra days until a pea shatters rather than dents under a hammer, and store it airtight in a cool, dark cupboard, where it stays viable for 3 years.
Because peas are self-pollinating, they are effectively all open-pollinated and heirloom — there are no hybrids to worry about, and cross-pollination between varieties is rare even when they grow side by side, so seed saved from a snap pea grows snap peas again. Before you commit a jar to next season, run a quick viability check: fold ten peas into a damp paper towel, keep it warm for a week, and count how many sprout. Eight or more means a healthy, plantable batch; far fewer means it is time for fresh seed. The same fundamentals apply across the garden in how to save seeds.
🌍 A Short History of Peas
Few crops have travelled as far or as long with humanity as the pea, a plant older than pottery that later helped unlock the science of heredity itself.
Peas are among the very first plants humans domesticated, cultivated more than 11,000 years ago in the Fertile Crescent alongside wheat, barley, and lentils. Carbonized peas turn up in Neolithic settlements from Greece to Egypt, eaten as a dried pulse long before anyone thought to pick them sweet and green. Millennia later, in a monastery garden in Moravia, Gregor Mendel crossed thousands of pea plants in the 1860s and read in their round and wrinkled seeds the basic laws of inheritance — founding the science of genetics on Pisum sativum.
Thomas Jefferson grew more than 30 varieties of pea at Monticello and raced his neighbours each spring to bring the first dish to the table. Today the US splits its crop by use: fresh and processing peas centre on the Pacific Northwest, Minnesota, and Wisconsin, while dry field peas are a Northern Plains staple led by Montana and North Dakota, much of it grown in rotation with wheat.
Canada is the world’s largest producer and exporter of dry field peas, the bulk of it yellow peas grown across Saskatchewan and Alberta. From modest beginnings the Prairie crop has grown to ship to dozens of countries a year, feeding a global appetite for pea protein — a remarkable rise for a plant that thrives on exactly the cool, dry summers the Prairies offer.
Pea FAQ
Related Pea Guides
The master method behind every jar sprout, from soak times to keeping a batch clean.
Take peas one step past shoots into tray-grown greens, plus sunflower, radish, and more.
The pea’s closest kitchen cousin and fellow nitrogen-fixer, from jar to cover crop.
The same pod-by-pod harvest on a warm-season legume, bush and pole types covered.
The cool-season green that shares a bed and a season with climbing peas.
Where peas fit in a full green-manure rotation of legumes, grasses, and brassicas.


